
Box on demand systems promise a simple idea: instead of keeping a warehouse full of standard carton sizes, you cut a box to fit each product, when you need it. Standard boxes rarely match the product, so packers add void fill, use extra board and pay to ship air.
But “box on demand” covers a wide range of equipment, from a single CNC box maker run by one operator to fully automated lines that measure, cut, form and close each box. Choosing well starts with understanding your own products and packing process. This checklist walks through the questions worth answering before you talk to any supplier.
1. Start with your product mix, not the machine
Box on demand pays off most where product sizes vary a lot, or where products are too long, flat or awkward for stock cartons. Furniture (especially flat-pack), panels and boards, long components, and mixed e-commerce orders are typical examples. Before looking at machines, gather some data:
- The range of product dimensions you ship: smallest, largest and most common.
- How many different box sizes you currently stock, and how often they fit badly.
- Daily and peak volumes, and how they are spread across shifts.
If almost everything you ship fits three or four standard sizes, the case for on-demand boxes is weaker. If you have dozens of sizes and still use a lot of void fill, it is much stronger.
2. Understand how the box is made
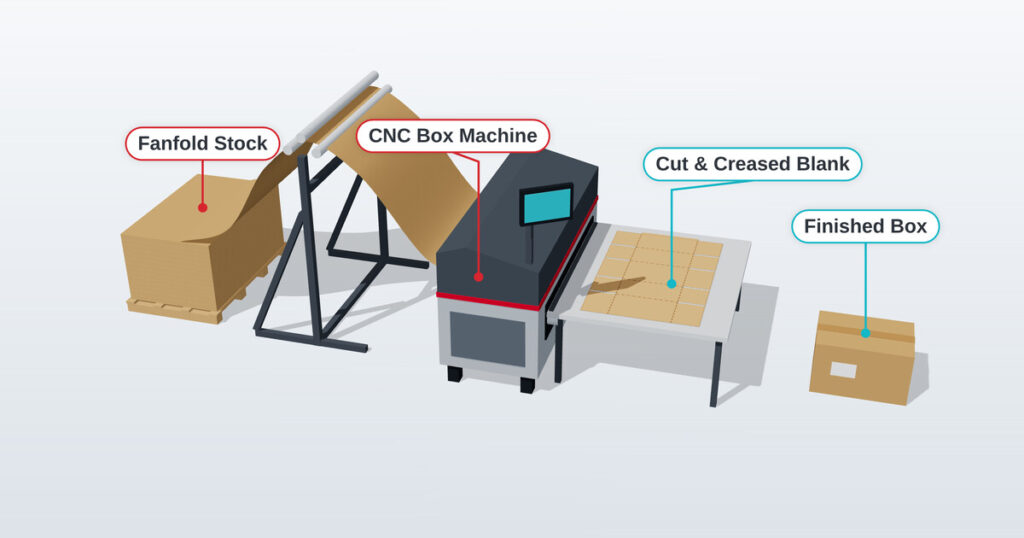
Most box on demand machines are CNC box makers. They take corrugated board, either as continuous fanfold (Z-fold) board or as individual sheets, and use tools on transverse and longitudinal axes to cut, crease and slot a box blank to the dimensions entered in the software. Ask:
- Fanfold, sheets or both? Fanfold supports continuous production with fewer interruptions; sheets may suit existing supply chains. Check whether automatic sheet feeding is available if you plan to use sheets.
- How are tools positioned? Different designs move cutting and creasing tools in different ways. This affects setup time between box sizes and the minimum distance between tools, which in turn limits small box dimensions.
- What are the minimum and maximum blank sizes? Make sure your smallest and largest products are covered.
3. Check board width, thickness and flute types
The maximum board width sets the upper limit on blank size, and therefore on box size. Thickness and flute range determine which board grades you can run. If you ship heavy or fragile items in double wall board, confirm the machine handles your exact grades, not just “corrugated board” in general. Ask suppliers to run samples on your own board where possible.
Also consider storage: you keep board in one or two widths instead of many box sizes, but fanfold stacks still need space near the machine.
4. Look closely at software and box styles
The software is where operators spend their time, so it deserves as much attention as the mechanics. Points to examine:
- How many predefined box styles are included, and whether they match the styles you use.
- Whether you can design new box styles yourself, and how easy that is.
- How box dimensions are entered: manually, from an order file, or automatically from a measuring station.
- Whether the software can connect to your ERP, warehouse system or order management.
The FEFCO code, the international standard catalogue of corrugated box styles, is a useful common language here. Wrap-around styles such as FEFCO 0410, where the blank folds around the product, are widely used for furniture, panels and long items, and they lend themselves well to automated closing.
5. Be realistic about throughput
Axis speeds on a datasheet are only part of the story. Real output depends on box size, box style, how often sizes change, how board is fed, and above all what happens after the blank is cut. A fast box maker feeding a slow manual packing table will not deliver the output you expect. Ask for:
- Realistic boxes per hour for your typical box sizes, not the best case.
- The impact of frequent size changes on output.
- Options to add capacity later, such as additional tool stations or modular configurations.
6. Plan forming, closing and labelling from day one
Cutting the box is often the easy part. Forming the box around the product and closing it can take more labour than the cutting itself. Decide early how far you want to automate:
- Manual forming and closing keeps investment low but ties up operators.
- Automatic closing machines can fold and seal boxes, either with hot-melt glue or with tape, depending on the box style and design. Glue-based closing is common for wrap-around boxes; taping is common for top-closing cartons.
- Full lines can add a 3D scanning station at the infeed that measures each product and sends its dimensions straight to the box maker, so the right box arrives at the right time without manual data entry.
7. Think about space, utilities and service
Complete lines can be long, and even a stand-alone box maker needs room for board supply and blank handling. Check power supply requirements, compressed air needs, floor space for the full line, and the operating temperature range. Finally, ask how service works in your country: local partners, remote support, spare parts availability and operator training.
A quick checklist
- Do we have enough size variation and void fill to justify box on demand?
- Does the machine cover our smallest and largest products?
- Can it process our board grades, widths and flute types?
- Does the software include the box styles we need and connect to our systems?
- What is the realistic output for our box mix?
- How will boxes be formed, closed and labelled?
- Do we have the space, utilities and service support for the system?